|
I have recently started reflecting on where plants in our garden are originally from, because people often ask me the same question about myself. Most of our flowers, fruits, veggies and herbs in the garden are from other countries. I have started writing a series of blog posts to explore some of our favourite flowers and edibles we have grown over the years which are from overseas. In this post, I would like to cover some plants we have grown in our garden that are thought to originate from Africa. Watermelon Years ago, I used to be able to grow watermelons (and other types of melons) successfully in our garden in Auckland. Sadly, this is no longer possible due to climate change as our summers start later every year, are shorter and temperatures are considerably cooler than in previous years. Here is a picture of a watermelon which I grew three years ago. It is a variety called Charleston Grey and was grown from seed.  Charleston Grey watermelon grown from seed Okra We love okra and enjoy growing it every summer. Like snake beans, I plant okra in late December and it usually crops in late autumn (April and May for us). I have experimented and discovered that okra performs better when planted in containers. I use 9 litre black square pots filled with potting mix. Okra is self-pollinating and does not require help from bees. The plants produce a beautiful flower in the hibiscus family, which turns into an okra pod. Once plants start forming flowers, I recommend keeping an eye on them regularly so you can pick okra as soon as they are fully developed. If left on the plant for too long, they become quite tough to eat and are not very nice.  Burgundy and green okra Broad beans We enjoy growing broad beans in spring. They are incredibly easy to grow, delicious to eat and the plants are good for fixing nitrogen in the soil. We shell and freeze surplus broad beans. I recommend blanching them first for best results.  Broad beans from our garden  Shelled broad beans ready for blanching, before freezing Shelled broad beans ready for blanching, before freezing Tropical impatiens I grew tropical impatiens from seed for the first time last spring. I sowed the seeds in a punnet filled with some seed raising mix and covered them with some more mixture lightly. I propagated them on my heat pad as temperatures can be quite cool in spring, especially at night. Once the plants had germinated, I moved them into our greenhouse to grow a bit more before potting them up into six cell punnets. Once they had outgrown them, I potted each plant into an individual 10cm plastic pot and left them in our patio to grow. In late summer, I potted each plant into a larger pot. As it started to get cooler towards the end of autumn, I moved the plants into our greenhouse as tropical impatiens are sensitive to the cold and I didn’t want to risk losing the plants, especially as I had put so much effort into caring for them. Here is a picture of the fourteen plants that originated from a packet containing approximately 20 seeds. The variety is called New Guinea Divine Mix and is available from Egmont Seeds in New Zealand. If you live overseas, check your local mail order seed suppliers to see if they have this variety.  The tropical impatiens I raised from seed last spring, which are currently in our greenhouse
0 Comments
It has been a shamelessly long time since I have written a blog post and I thought it was about time I resurrected the blog section of my website. Apart from the three month hiatus when my laptop was being repaired during the last lockdown, I have been very diligent at writing my weekly gardening newsletter. I really think that this would benefit from being supplemented by extra gardening tips and news about what is happening at Anita’s Garden. I will try to include the link to my recent blog posts in my newsletter, so readers can stay up to date. It feels like summer is over. Our Naked Ladies have started flowering, which for me is a sign that we have moved into autumn. 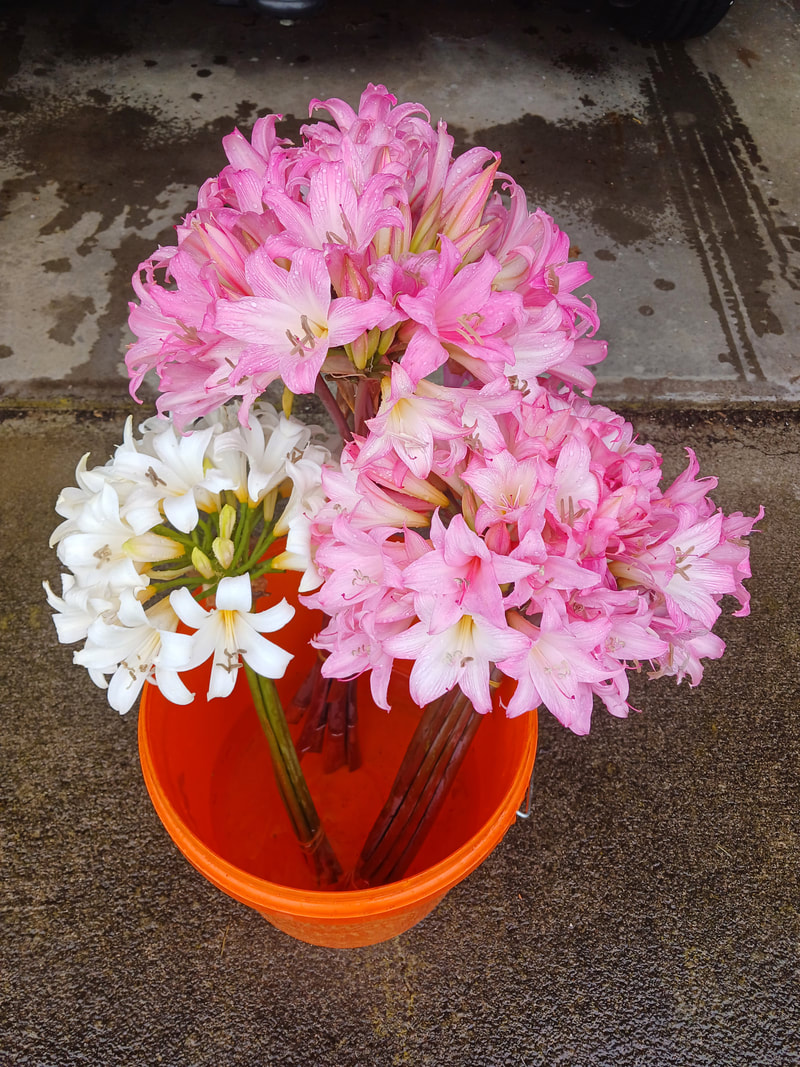 It has been an interesting season with a mix of successes and failures. I would like to share them with you. Successes


 Failures
 Rock Melon "Hale's Best" from Egmont Seeds, grown in summer 2016/2017 Nothing beats biting into a slice of juicy, sweet melon on a hot summer’s day. Our melons last summer had so much flavour and they were so delicious. There is simply no comparison with store bought melons. Melons can be a bit tricky to grow. They do require a bit more care than other plants in the summer garden but it is completely worth spending the extra time on them. It is entirely possible to grow melons successfully. You can expect to harvest your own fresh home grown melons towards the end of the summer in February and March. Last year I was successful in growing watermelon, rock melon and honeydew melon for the first time after successive years of failure. A friend of mine, Kylie Stringer, is a seasoned gardener and is an expert in growing melons. Kylie lives in Motueka, which is about an hour from Nelson, at the top of New Zealand’s South Island. Last spring, Kylie took pity on me and gave me lots of great advice on growing melons so I could also succeed like her. I’d love to pass on her tips to other keen gardeners so they can also grow melons successfully this summer. I hope we have a glut of melons again. It’s a nice problem to have! Melons can be planted outdoors in November, but don’t be in a rush to do so. There is often a dramatic difference between day and night time temperatures at this time of the year and the weather can still be quite temperamental. It’s therefore a good idea to wait until the second week of November to plant melon seedlings into your garden. Sowing melons from seed It’s much too early to think about planting melons outdoors. It’s still way too cold! However, I wanted to write a guide to growing melons now because you can start sowing melons under cover from seed. It’s really easy to grow melons from seed and it allows you to grow unusual varieties which aren’t found in garden centres. It takes about six to eight weeks from the time of the germination of a melon seed to produce a plant that is large enough to transplant outside. Melons can be started from seed indoors in October or even earlier if you live in a more temperate zone and have a hot house to protect them from the cold. Melon seeds need warmth in order to germinate. I germinate seeds in punnets or egg cartons filled with seed raising mix from Gardn Gro (http://gardngro.co.nz/). I like Gardn Gro’s seed raising mix as it is very fine in texture, enabling seeds to push through the mixture easily as they rise to the surface. I place the punnets and egg cartons inside plastic incubators which you can purchase from garden centres. I then place the incubators on a heat pad indoors and spray plants with water once daily or twice if the seed raising mixture is very dry. If you don’t have a heat pad you can also use your hot water cupboard which will also provide seedlings with a warm environment so they can germinate successfully. How to care for melon seedlings For new gardeners, those who don’t wish to start melon seedlings from seed or if you’ve simply left it too late, melon plants are available for sale in nurseries from around mid-October onwards. Take care to keep plants undercover until about the third week of October as melons are frost sensitive. The weather can be temperamental in spring and the nights are often still quite cool. From then on, start “hardening them off”. This is the process of exposing plants to the outdoors incrementally, for example, for two hours in the middle of the day for the first week, increasing to four hours per day for the next week. Continue to bring the plants indoors at night. By the third week of October, it should be safe to leave plants outdoors overnight. Don’t rush to plant your melon seedlings outdoors. To be on the safe side, it’s best to wait until the second week of November or so, until temperatures stabilise. Melon varieties There are three main types of melons: watermelon, rock melon and honeydew melon. Popular watermelon varieties that perform well in New Zealand include Sugar Baby (Franchi Seeds and Egmont Seeds), Sugar Belle F1 (Egmont Seeds), Crimson Sweet (Egmont Seeds) and Charleston Grey (Egmont Seeds). In places where summers are short, it’s advisable to plant watermelon varieties that mature early, such as Sugar Baby and Sugar Belle F1. The most popular rock melon grown in New Zealand is the reliable variety Hale’s Best (Egmont Seeds). Last summer I grew the variety Retato Degli Ortolani from Franchi, which performed marvellously well. The flesh was orange and deliciously sweet. There is only one variety of honeydew melon on the market in New Zealand. It is a standard sweet green melon and is available through Egmont Seeds. Bored with growing traditional melon varieties? Why not try growing something a bit different this summer. This season, I’m growing Giallo da Inverno (Franchi Seeds), which is a late melon with yellow skin and white sweet flesh. I’m going to give Zatta (Franchi Seeds) another try this year, having failed to grow it successfully last summer. Zatta is not the most beautiful melon but is said to be unbelievably good. Zatta has green skin with scales, but great tasting orange flesh. I’m also sowing Banana Melon. As the name suggests, this variety has banana-shaped fruit with smooth yellow skin and sweet, spicy salmon flesh. Kylie kindly gave me some seeds from her own prolific harvest a few years ago, which I’m keen to grow in my own garden this season. To order seeds from the Egmont Seeds range, visit http://www.egmontseeds.co.nz/. To find stockists for Franchi Seeds or to order Franchi seeds directly from the New Zealand distributor Italian Seeds Pronto owned by Gillian Hurley-Gordon, visit http://www.italianseedspronto.co.nz/. How to care for melon plants Melons need at least 6 hours of sunshine per day, so be sure to plant seedlings in the sunniest spot in your garden. Before planting melon seedlings, take the time to prepare the bed properly so plants receive adequate nutrition. Dig the area over that you wish to plant your seedlings in. Mix plenty of compost and some sheep pellets into the ground. I highly recommend Gardn Gro’s Wonder Nuggets, which are 100% organic and function as an excellent fertiliser: http://gardngro.co.nz/shop/Fertilisers/Wonder+Nuggets+8kg.html. Rake the ground so that it is nice and level. Once you are satisfied that the ground has been adequately prepared, lay down black plastic over the entire area. You may need to cut the roll to fit the shape of the area where you intend growing your melons. Place a heavy object such as tiles or bricks in the corners of the black plastic to prevent it from flying away. The reason for planting melon seedlings through the black plastic is to radiate the sun and conserve warmth, as the ground can still be quite cool in November. I used black plastic for my melon patch for the first time last year at Kylie’s recommendation and it made the world of difference. When you’re ready to plant your seedlings, simply cut a hole through the black plastic where you intend to plant the melon. Dig a hole for each plant deep enough so that the roots of the seedling can be completely buried. Add some fertiliser to each plant’s hole at the time of planting to give your melons a strong start to life. Any fertiliser which is high in potassium, for example tomato fertiliser, will do. Mix the fertiliser into the soil in each plant’s hole prior to planting. Melons need quite a bit of space as they tend to creep once they start growing. Therefore, space seedlings approximately 1 metre apart. Be sure to water plants every day, preferably early in the morning or in the evening. In November and December, plants are in their most active growing phase. Try not to get too much water on the leaves, otherwise your plants may develop powdery mildew. Liquid feed melons weekly to encourage the growth of healthy leaves and the formation of flowers, which will develop into fruit after they have been pollinated. Pollination of melons Melons need to be pollinated in order to develop fruit. As the flowers on melon plants are so small, bees often miss them. By hand pollinating your melon plants, you can increase the potential yield of fruit. Each melon contains both male and female flowers. The way to tell the difference between the two is that female flowers will have formed a very tiny melon underneath. However, this won’t grow into a proper melon unless it is pollinated. Although you can use a paint brush, the easiest way to pollinate melons is simply by hand. Carefully pull off the male flower from a melon plant and remove the petals. It helps if you remove the male flower so that it has a bit of a stem where it was attached to the melon plant. Make sure you do not pull off any female flowers by accident. You will notice that the stamen, or inner part of the male flower, will contain pollen. Carefully insert the stamen on the male flower into the inner part of the female flower, which is called the stigma. Rub the stamen onto the stigma of the female flower. Remember that watermelon, rock melon and honeydew melon are different species of melons. Therefore, you can only pollinate a watermelon with another watermelon, a rock melon with another rock melon and a honeydew melon with another honeydew melon. For best results, hand pollinate melons every day. I find that it’s best to do this in the morning, as ants will eat the pollen on male flowers during the day. As melons develop, pop an old lid, saucer or plate underneath so the fruit doesn’t come into direct contact with the ground and cause the melon to rot. Harvesting your melons It can take what seems like forever for melons to be ready for picking but be patient! Melons need a lot of sunshine in order to grow and ripen. Melons are ready to be harvested when the stalk attaching the melon to the plant has turned brown. They should slip away easily from the vine by hand. If you need to cut them off, it’s a sign that they’re not yet ready to be harvested. Another way to tell if a melon is ripe is to knock on the melon. If the sound is hollow, it’s a sign that the melon is ready for picking. Got a glut of melons that you can’t get through all at once? Melons can be stored in the fridge for 2-3 weeks prior to consumption.  |
Archives
March 2024
Categories
All
|
 RSS Feed